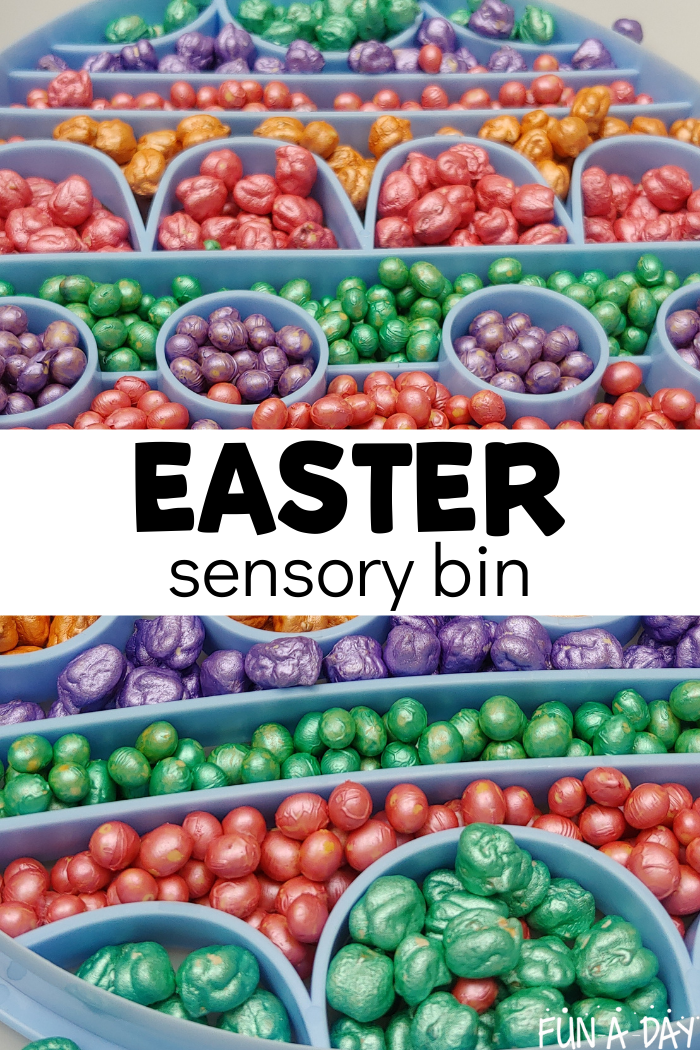
This super engaging, colorful Easter sensory bin is sure to end up one of your favorite Easter activities for toddlers and preschoolers!
Related: Easter Egg Activities
We’re big fans of sensory play over here, how about you? Kids learn through their senses, so it makes . . . sense . . . to include such play both in the classroom and at home.
This particular sensory bin incorporates a few different skills:
- Color identification
- Sorting
- Fine motor practice
- Language development
- Vocabulary
Plus, it’s just plain FUN! I’m not exaggerating when I say this sensory invitation got hours of engagement.
Easter Sensory Bin
Below, I’m going to share with you how I put this Easter sensory experience together. While I love super simple sensory bins, sometimes I like to spice things up a bit! That’s definitely the case here.
But keep in mind that you can easily make adjustments to this idea based on your own preferences and what you have on-hand. Don’t let everything I did overwhelm you. Remember, you know your students and classroom best. So take what works and discard the rest.
Materials We Used
Here’s a list of what went into our Easter sensory bin. Since I have been collecting materials for years (decades, even!), I have a big stash on-hand now. So it was just a matter of going through the bins and pulling out what we wanted to use.
You can change things up as you see fit!
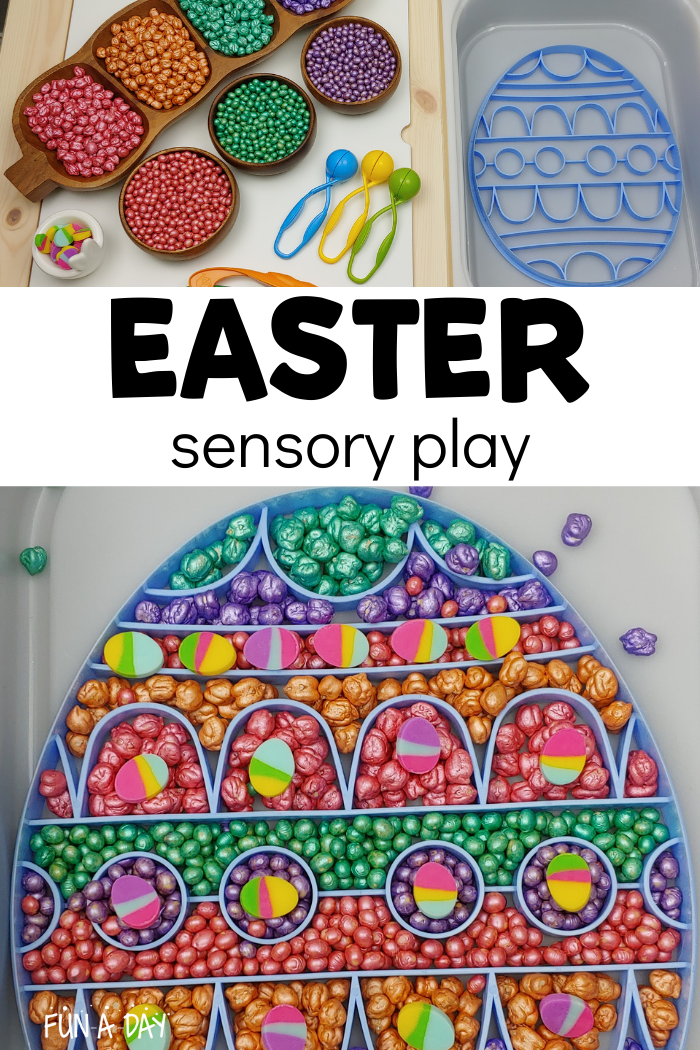
- IKEA Flisat sensory table and bins
- Large Easter egg cookie cutter (found at Target last year)
- Dry chickpeas
- Dry soybeans
- BioColor paints
- Bamboo bowls
- Wooden sorting tray
- Easter mini erasers
- Rabbit ear egg cups
- Kid-size tweezers
- Squeezy tweezers
As I mentioned earlier, I’ve been gathering items for years and years now. Some of the above items were picked up at Target, from sale racks of various local stores, from Discount School Supply, or from some online shops.
How to Color Chickpeas and Soybeans
I have to admit, I rather enjoy dyeing materials for sensory bins. Mostly because the kids seem to get a kick out of it, too. Plus, it adds a bit of “spice” to things, right?
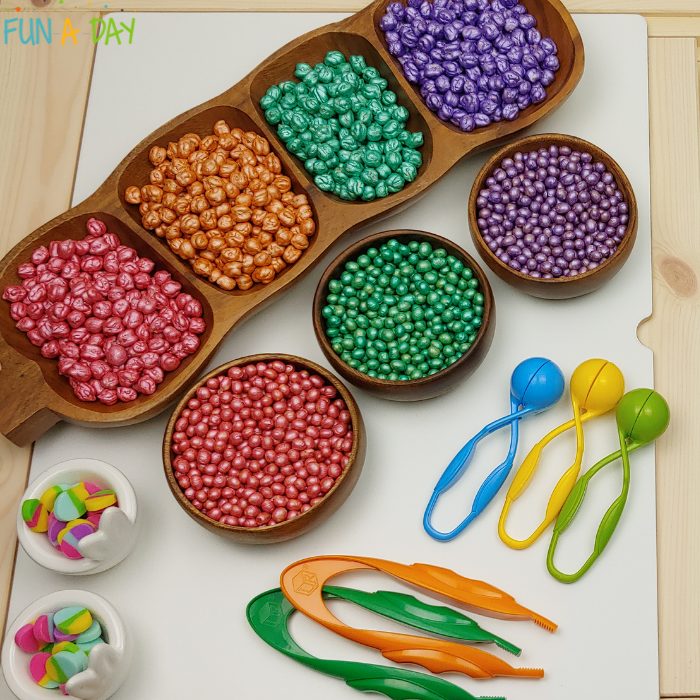
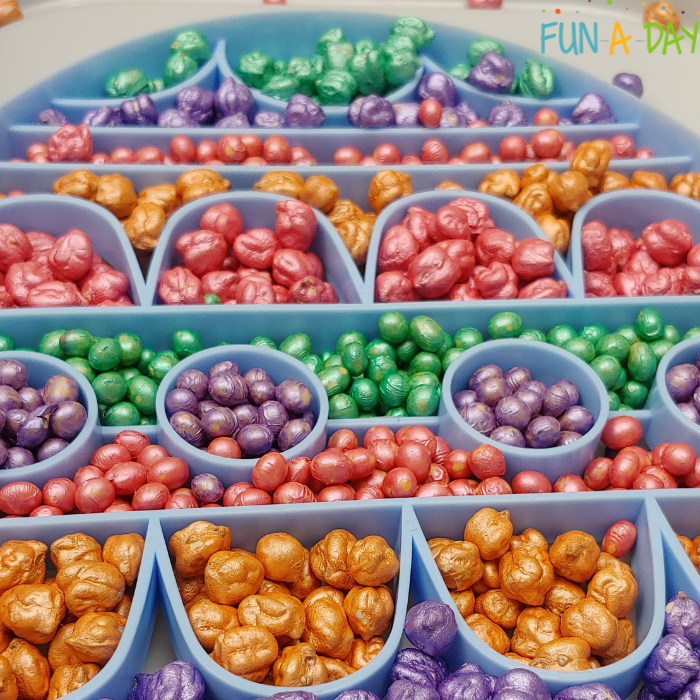
For the Easter sensory bin, I decided to use soybeans because they look like tiny eggs. Plus, they have a smoother texture to them that I appreciated. I might not have dyed them quite as well as I wanted because I rushed a little bit. But they still turned out pretty colorful, I think.
Related: Easter Sensory Bottles
The chickpeas were included because I wanted something a little different with the soybeans. Chickpeas are a bit of a different shape, and their texture was a good complement to the soybeans. I often use And Next Comes L’s chickpea dyeing method, but I wanted to change things up a smidge this time around.
Here’s what to do if you want to color yours the same way I did:
- Add the chickpeas to a baggie or reusable container. Whatever you use, just make sure it can be closed securely.
- Squirt in a bit of BioColor paint into the container.
- Seal it very well! This is a VERY important step. Ask how I know?!
- Shake things up a bit to disperse the paint. Add a little more paint if you feel it’s needed.
- Place the chickpeas out on a tray to dry.
- Repeat the process with the soybeans or different color chickpeas.
Make sure that you spread the chickpeas and soybeans out in one layer to dry. Some of them might dry together because of the paint. I didn’t find it to be a big deal. Just separate them as best you can while wet and then pull them apart if they dry together.
Setting Up the Easter Sensory Activity
Once your chickpeas and soybeans are fully dry, gather the rest of your materials. Then it’s time to set up the Easter sensory bin!
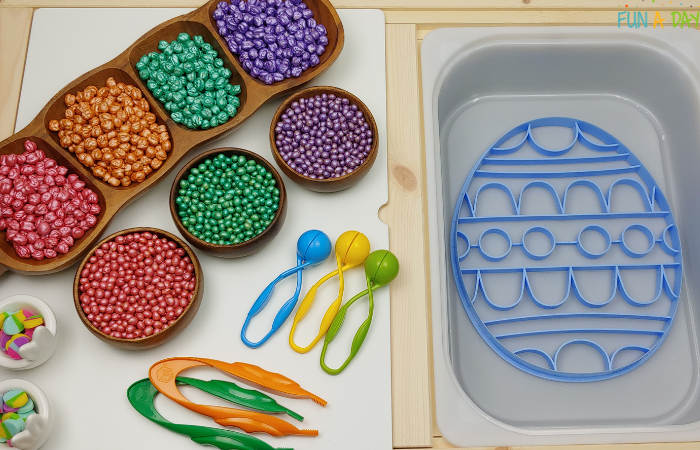
I have a variety of sensory bins and trays, but we decided on the little IKEA table for this sensory invitation. The ability to have a bin and a flat surface next to it was pretty handy. I think it would work just as well in a regular sensory bin, too.
Related: Carrot Garden Sensory Bin
Place the giant egg cookie cutter in a shallow bin of some sort. Add the colorful sensory materials to bowls and/or trays. I put the chickpeas and soybeans into different spots to start out with, even knowing they’d end up all mixed together.
Then it’s time to add any manipulatives or additional sensory items to the bin. I chose to place egg-shaped mini erasers in little bunny ear ramekins just because. Plus, mini erasers add that extra sense of whimsy.
After that, add any fine motor tools your students enjoy using. For our Easter sensory tub, I went with kid-sized tweezers and “squeezy” tweezers. The kids don’t have to use the fine motor tools, but the tools appeal to a certain percentage of children.
Finally, let the kids get into the sensory play!
Playing with the Easter Sensory Bin
As with most things preschool-related, this sensory invitation can be used in a multitude of ways. If you ever run out of ideas, just sit back and observe how the children interact with the materials. They often come up with new ideas us adults didn’t even consider, right?!
Some children are going to enjoy dumping the chickpeas and soybeans into the bin, pouring and moving them all around. If your students are more into dumping and pouring right now, just make sure to have an extra bin available for them.
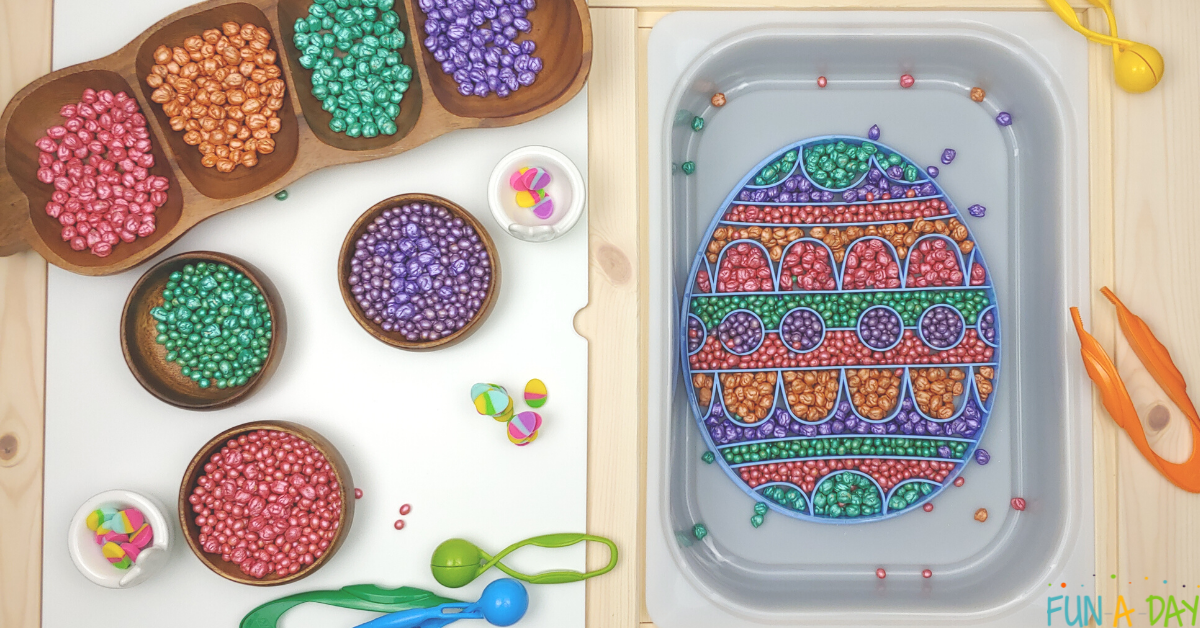
Others might focus in on adding the sensory materials to the big cookie cutter. This is what we ended up doing the first time (the pouring and dumping came later). We called it “decorating the Easter egg” as chickpeas and soybeans were transferred using the squeezy tweezers and fingers. The child-sized tweezers came into play as the final “decorations” (mini erasers) were placed.
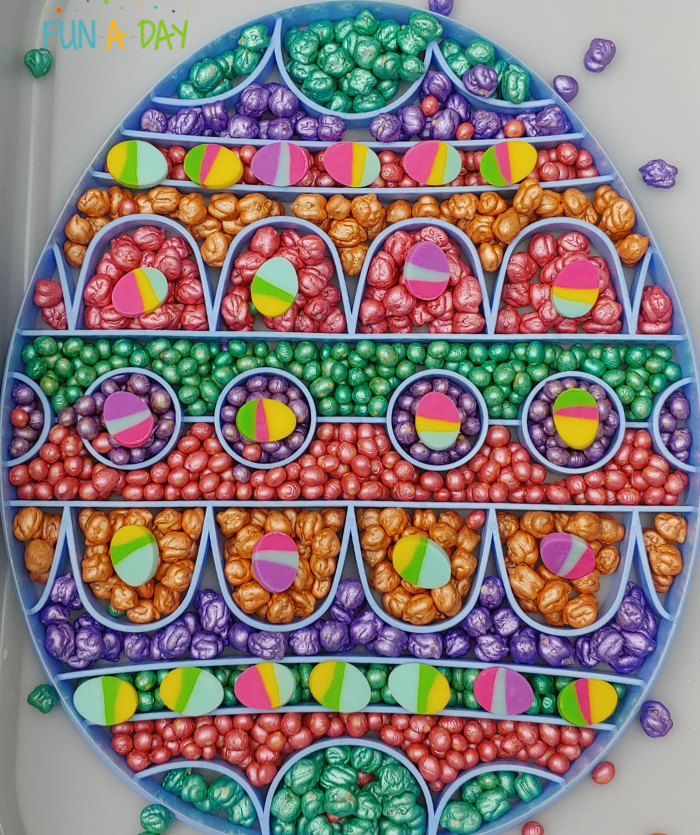
Still others might end up sorting the sensory materials, and children might even get into making patterns with what’s available. As I already mentioned, there are SO many ways to play with the materials!
A Few Other Ideas
You can set up your Easter sensory bin a little differently than ours based on your preferences and available materials. In case you want them, here are a few more ideas:
- Add funnels, cups, and scoops to the sensory play.
- Color extra chickpeas and soybeans and fill a larger bin with the materials.
- Set aside a dedicated spot for children who want to explore pattern making.
- Place a balance scale alongside the materials.
- Add plastic eggs the kids can fill, shake, and empty.
- Use completely different materials as the base (mini pompoms, colorful buttons, etc.).
Those are just a few additional ideas to inspire you. Better yet, ask your students to help “design” the sensory tub and see where their ideas take you!
How to Clean Up the Easter Sensory Bin
Cleaning up is just part of sensory play, right? I highly recommend getting your students involved in the clean up process. Cleaning is a basic life skill, and multiple people can make the process faster (well, sometimes).
Start off by having the children handle any of the materials that fell out of the bin. You can place a mat, or even a fitted sheet, underneath your sensory table to help with clean up. Kids can also pick up the materials, or they can use handheld brooms and dustpans.
Then it’s time to sort through everything. By the time our Easter sensory play was over, the soybeans and chickpeas were pretty intermingled. The mini erasers were mixed in there, as well. I decided to leave the chickpeas and soybeans alone, but had the kids locate the mini erasers.
The mini erasers were packed away in their little containers, while the sensory bases were put in zip-top bags. You can also use lidded containers to hold your chickpeas and soybeans, if you prefer. I love saving sensory materials so I can use them for a variety of sensory invitations, as well as other preschool activities. Things tend to be used for years and years over here!
Then have the children help put the fine motor tools away in their respective spots. Finally, work together to wipe up any bins and tables.
Would your students enjoy this Easter sensory bin? If you give it a try, let me know all about it in the comments below!
Done-For-You Easter Resources for Preschool
Let Preschool Teacher 101 make your teaching life easier! We have hundreds of thoroughly developed done-for-you resources. And don’t forget to join the waiting list for The Pack from Preschool Teacher 101, a membership that gives you access to these resources (among other things).
If your students enjoyed the Easter sensory bin, you’ll want to check out our Easter lesson plans. Click on the image below to read more:
Here are a few more resources that will make your Easter and spring planning a lot easier:
The post Easter Sensory Bin with Colorful Chickpeas and Soybeans appeared first on Fun-A-Day!.


